

That being said, there was no Doom of Malan'tai figure in what I acquired, probably because Games Workshop never made one. Yeah, here's some rules for a killer monster, but uh, we don't really feel like actually making one. Thanks GW. So, after looking around at potential stand-ins, and conversions, I have decided to try to sculpt one from the ground up. I saw a post of another fella doing the same. His turned out pretty freakin' sweet. Soooooooo, here goes nothing!
Step One: THE IDEA


Step Two: THE FRAME
I began by cutting an ordinary clothes hanger and bending into the shape of the creature. Then I shaved a little pit into the base to help it rest there, and glued it securely down.

So once again I'm following suit of the guy I saw sculpt his Doom online. Rather than use copious amounts of modeling putty to fill out the body, I used aluminum foil. Once it was the way I wanted it, I added some super glue here and there to help hold it as I added the thin layer of Gale Force Nine green stuff. I tried to get it relatively smooth, but I really just needed a good canvas to lay the ProCreate sculpting putty on.


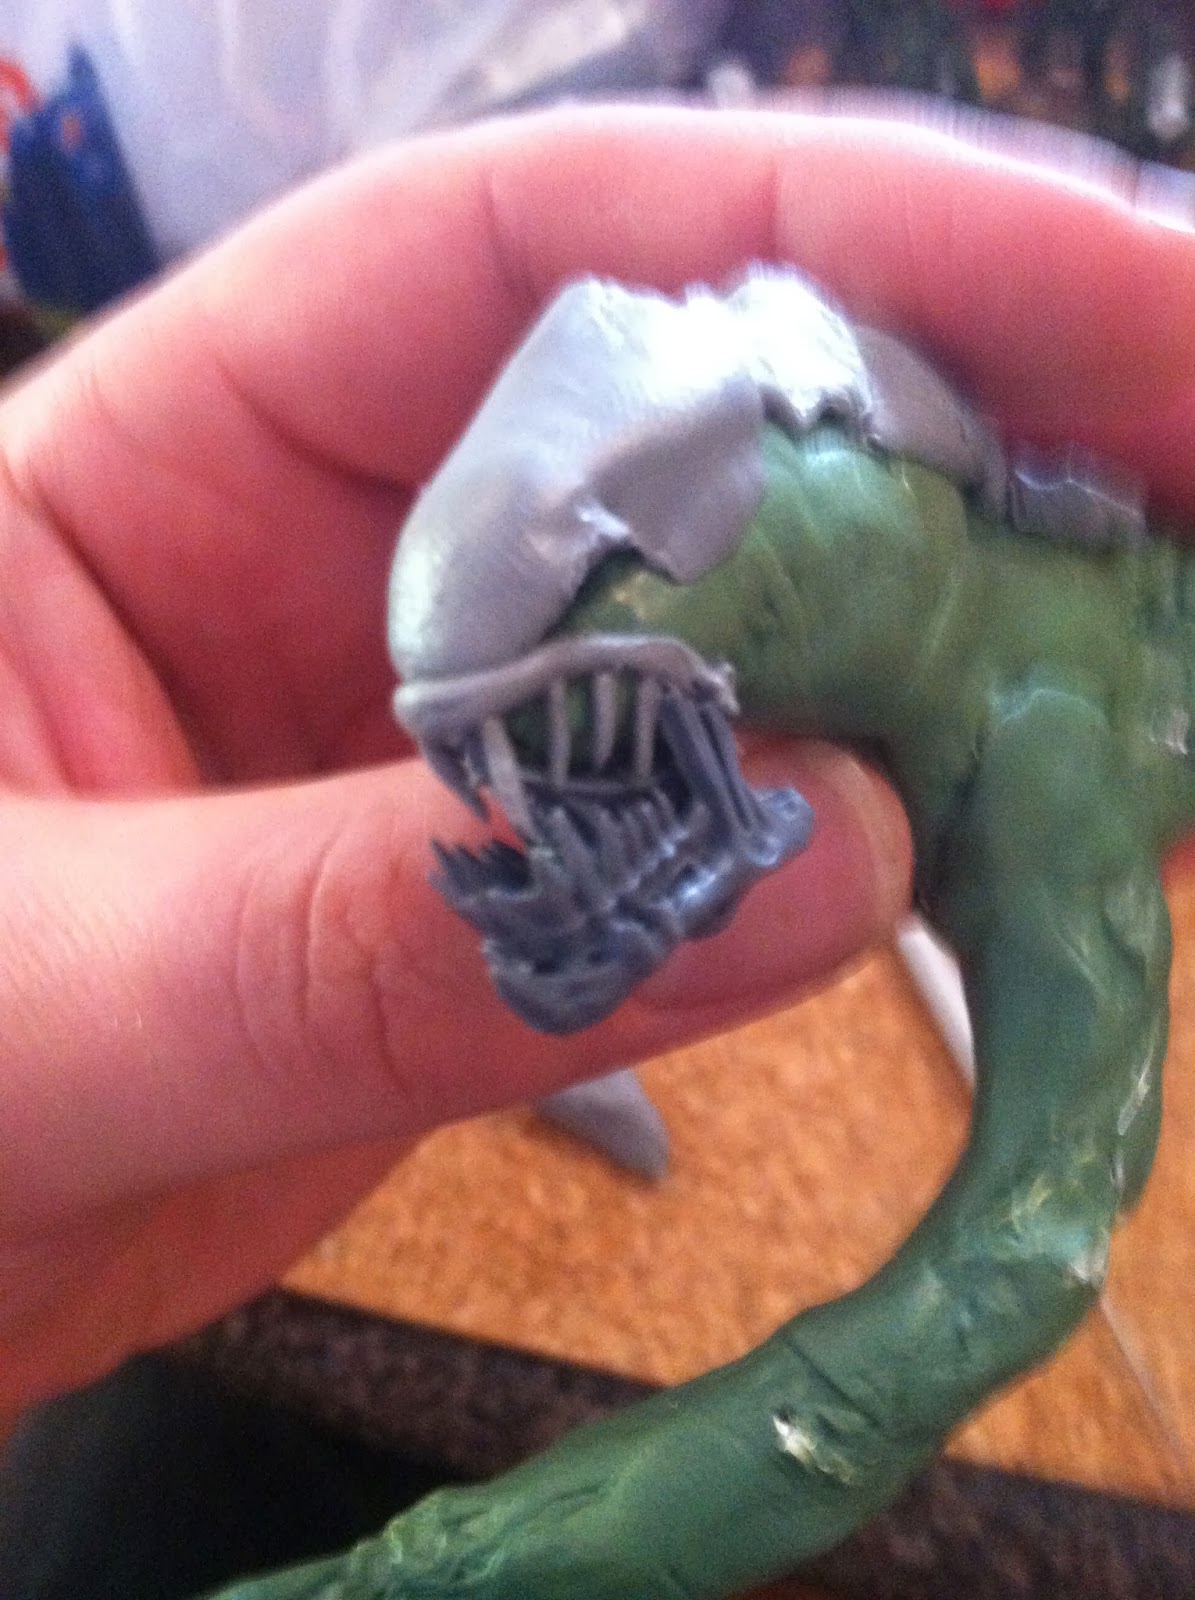
Step Four: GOB AND HEAD PLATES
I decided to use a spare Trygon lower jaw. I've never tried to sculpt teeth and a tongue, so I wanted a little help here. Once it was glued in place, I put a long strip of ProCreate putty on top of the head, and began working the plates with my dull pointer tool.
The last plate I left rough to simulate the brain tearing through it as it swells.

Step Five: UPPER MOUTH
The previous pic makes my Doom look more like a Dork - with its under bite and all. So, I needed to define its mouth - which I did with a rolled up piece of putty. I also added a front plate that goes down to the front of its mouth.
Step Six: TEETH
Looks like I'm doing teeth after all. I haven't gotten as many as the bottom, and I may add more once these dry, but I had a hard enough time keeping these ones from sticking together. Also, working with such small pieces of putty, they didn't want to stay straight. And while tusks wouldn't look terrible, the lower teeth are straight so I tried my best to follow suit.
He kind of has a fishy look to him with the big lip. This may get modified later. You'll also notice that there seems to be an eye socket forming. This was completely by accident, but I decided to go with it, as there was coincidentally one forming on the opposite side as well.


Step Seven: BRAIN PODS
Time for BRAINS!!! Knowing it would be nearly impossible to make the brain symmetrical, I didn't even try. Plus I feel it goes along with my idea of its brain swelling and shrinking with its current power.
The back big pods will be covered later once the front ones dry.

Detailing the brain was actually pretty easy. I used my needle tool to essentially draw into the putty.
*NOTE: if you are going to attempt this I have 2 pointers.
1. Do one side at a time and let it completely dry before starting the other. I kept touching the completed side with my finger - muddying up the details.
2. Let the putty cure a bit before carving into it with the needle tool. That way you're not dragging loads of putty around with the tip.

more coming soon...
Very nice!! Be fun for my girls to slice and dice 'em! :-)
ReplyDeleteAnna